Not every 3D model can display correctly in our viewer. To avoid display problems, we have prepared tips on the modeling process that will guarantee that your file will display correctly in the 3D viewer.
Vertices
The viewer is capable of working through 65,536 vertices per model segment. If you are working with a large 3D model with more than 2 million vertices, consider splitting the model into smaller parts that you load as separate repository entries. You can semantically link these entries together via the "part of" field. Unfortunately, at this time we do not provide the ability to load several models into a single 3D viewer scene.
Scene
Many of the problems associated with models not displaying correctly are related to the scene settings in the modeling software. The first item to check is the dimension unit that has been set. Our viewer is set to centimeters, so you should adopt the same unit in your modeling program before exporting, or set this unit in the export settings themselves, especially when you are using inches as unit. Otherwise, your model, when loaded into the viewer, may turn out to be so small that you can't find it in the view window, or so large that it makes it difficult to navigate in the view window.
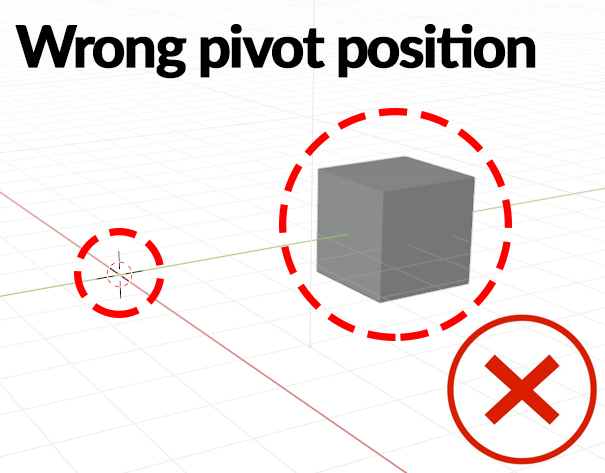
The second common problem is the location of the pivot outside the 3D model area. The pivot is point 0 of your model, defining the center of the scene. Its position is preserved during export and determines the center of the scene in the viewer.


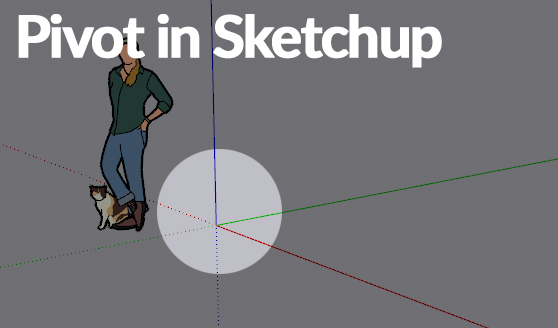
So if your model is away from it, and the view is centered on the pivot, the scene will look very strange, with the model far away in the background.That's why you should try to place your model in such a way that the pivot is in the center of it.

The last problematic element of scene export is the scene axis system. Very often the Y and Z axis get flipped after export, resulting in a "turned" model uploaded to the viewer. To avoid this, consider flipping the Y and Z axes already in the export settings.
Geometry
If you have the option to set the type of 3D model geometry when exporting, use triangulated mesh or poly. Don't use quads or parametric meshes.
Textures
Try to export along with textures also normals (vn) and texture coordinates (UV) information. Use squared textures with dimensions of power of 2 (n x n, where n2). It is good practice to check before uploading that normals and textures are applied to the model correctly. You can do this by making a test render in your 3D program and checking that the materials on the render look as you expect.<br>
Also pay attention to the names of the textures and materials you use in the model. Try from the beginning not to use white spaces and national characters (ó, ś, ą, etc.) in the names. Changing the names of files generated after export can cause errors in mapping textures to the model, as their names will be different than during export.
Model check before upload
It is also recommended to check before uploading the exported file. To do this, load the exported 3D format into a new scene in your 3D modeling program. If the loaded file does not display correctly, is rotated, deformed, or has a problem with textures this is a signal to check your export settings again.